Alright friends, we’re nearly two months into quarantine, and it might be safe to say a lot of #plantladies have blossomed while we’re all inside —me included! I’m up to 17 plants (I might have gone overboard) but they bring joy, clean air and interaction with your space that little else can compare to. That being said, those of us who live in smaller spaces don’t have a ton of open floor space for plants or great natural light to grow them. If that rings true for you and your home, then I’d like to welcome you to the staghorn.
I’ve always loved the idea of a mounted staghorn fern— I mean Martha loves them so I immediately do, too— and when I was cleaning out one of my kitchen cabinets I came across an old cheeseboard I don’t use and something clicked that made me want to use it to create my own mounted staghorn. They naturally grow on the side of trees and in shady rainforests so they’re perfect for a space with indirect light and putting it on the wall frees up sacred floor space. Let me show you how to do it!
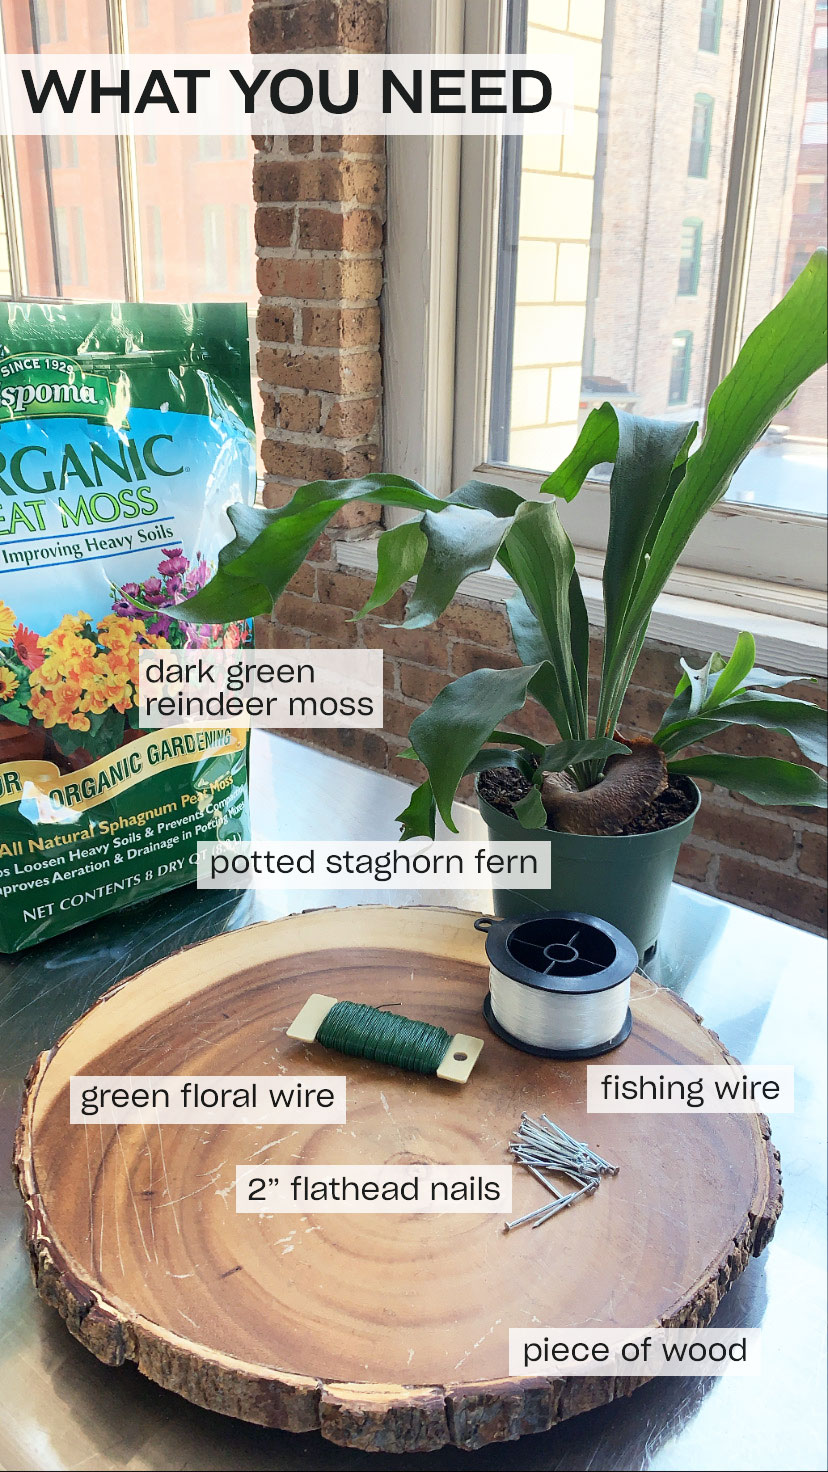
What You’ll Need:
- Potted staghorn fern
- Wood base (an old piece of driftwood, lumbar, cheeseboard, etc.)
- Reindeer moss
- Flathead nails (about 1.5” – 2” long is great depending on your wood’s depth)
- Screws
- Floral wire
- Fishing line
Follow these easy steps to create your wallhanging:
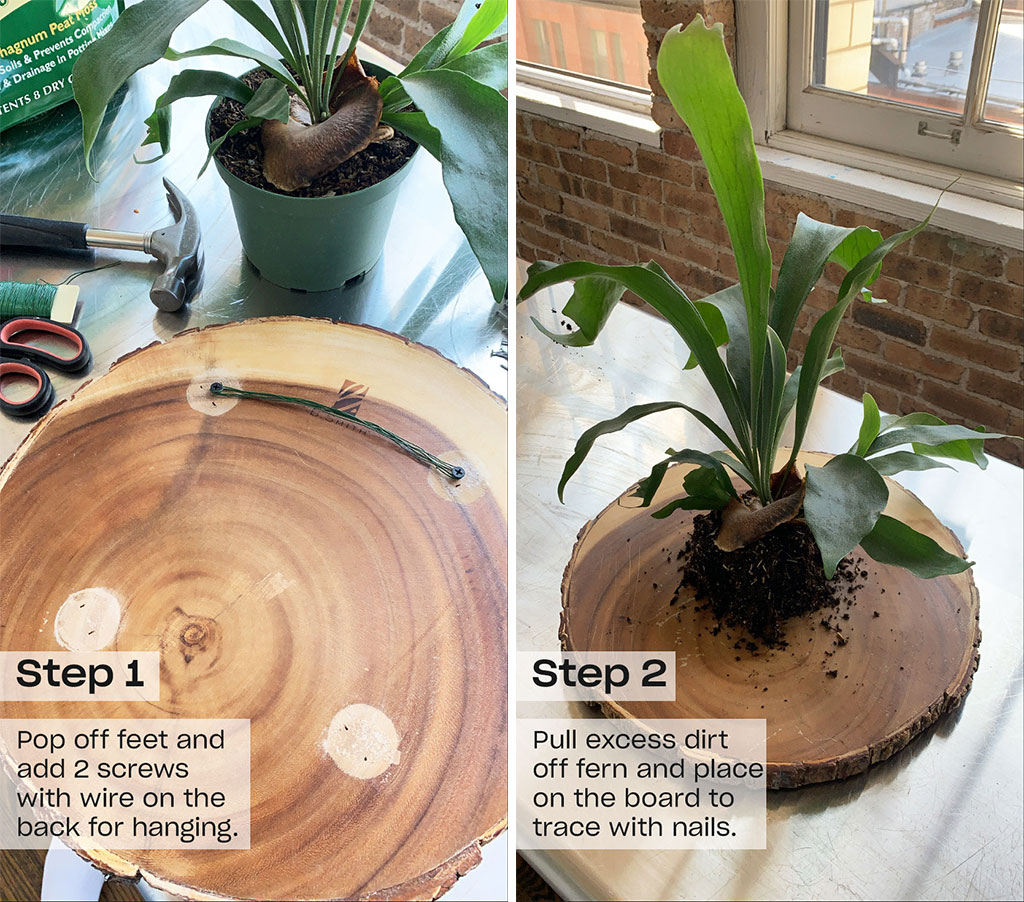
Step 1:
Pop off the feet (if applicable) of your wood and add two screws on the back for hanging Drill thin pilot holes if you have trouble getting the screws in, but be careful not to go through the other side of the wood! Securely loop a few layers of the floral wire between both screws. This is what you’ll use to hang on the wall. Remember to make sure the screws are low enough so that you won’t see the wire when you hang it (2” down and 3-4” apart should work great).
Step 2:
Turn your board over so the screws and wire are on the back. Pull/shake the excess dirt off the potted staghorn and place on the center of the board. Take your flathead nails and “trace” around the plant by tapping in the nails about 1” apart from each other. Leave a little room on all sides of the plant.
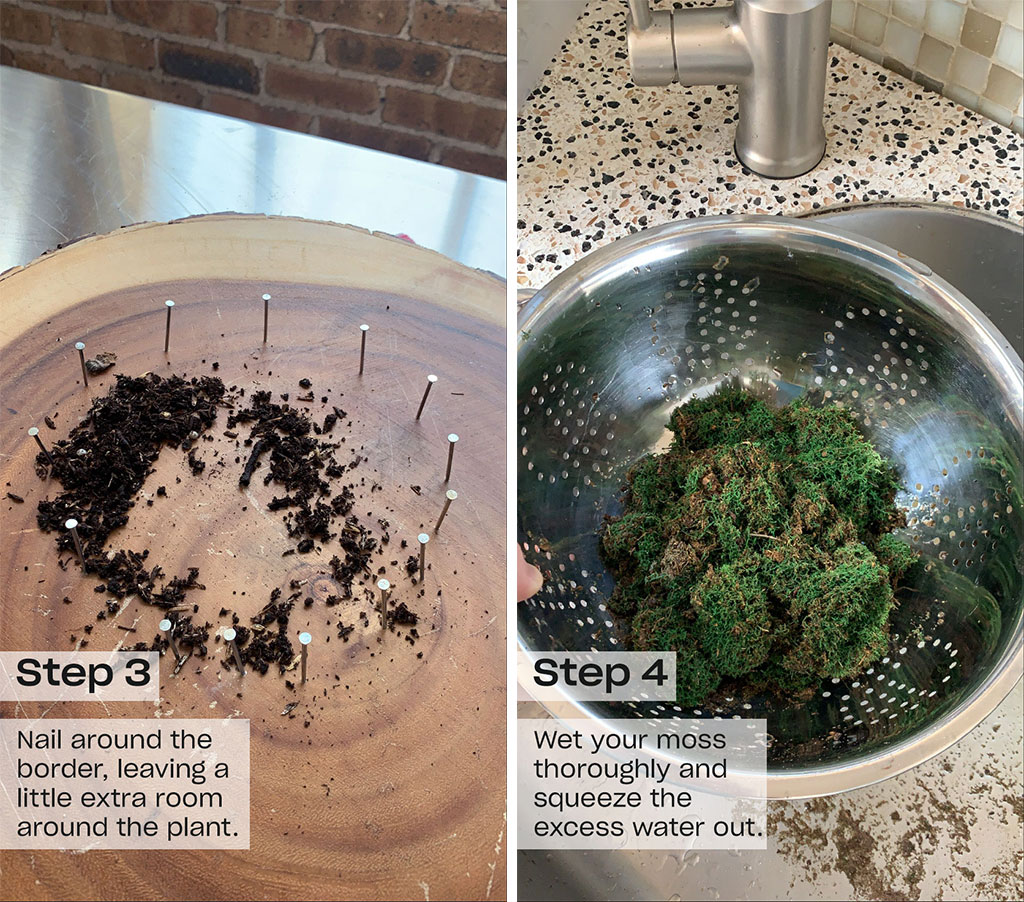
Step 3:
Take the plant away and hammer in the nails, leaving about 1” exposed but still secured into the wood.
Step 4:
Wet your moss completely and then squeeze the excess water out.
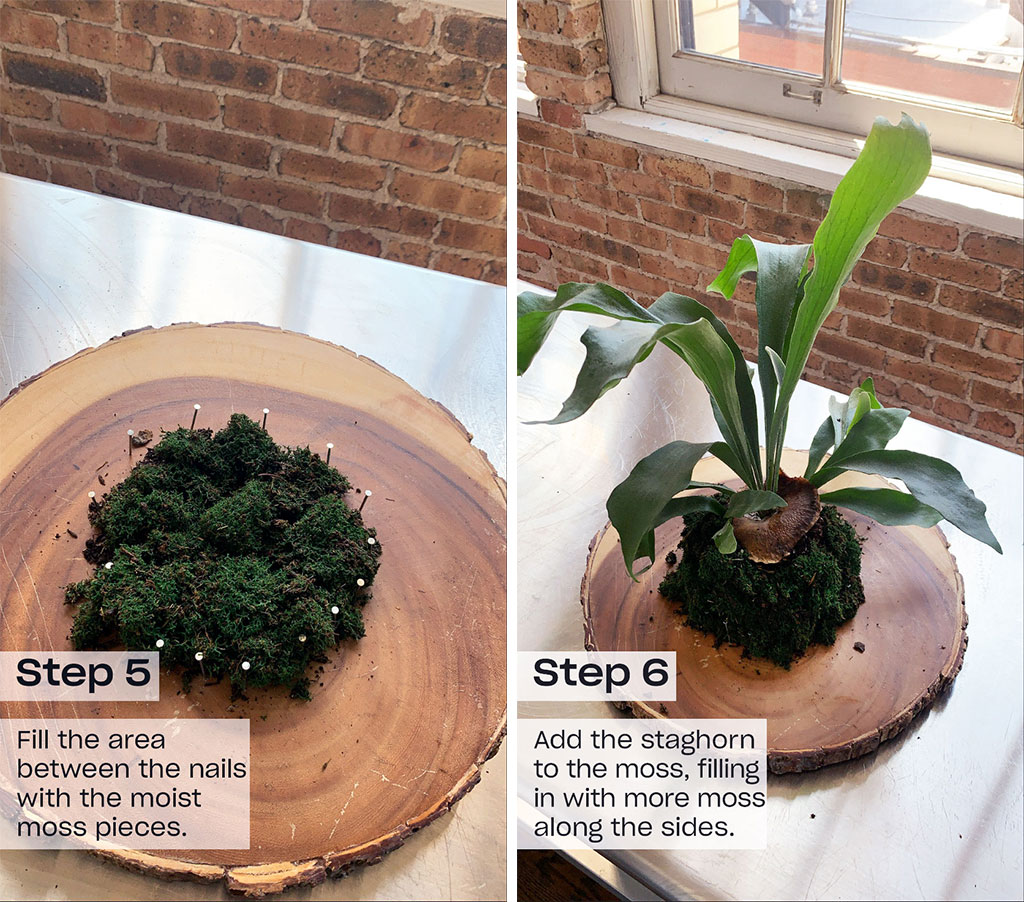
Step 5:
Fill the area between the nails with the moist moss. It’s best to add more to the “base” than the top to give the plant extra support.
Step 6:
Add the staghorn to the moss and add extra moss around the exposed dirt.
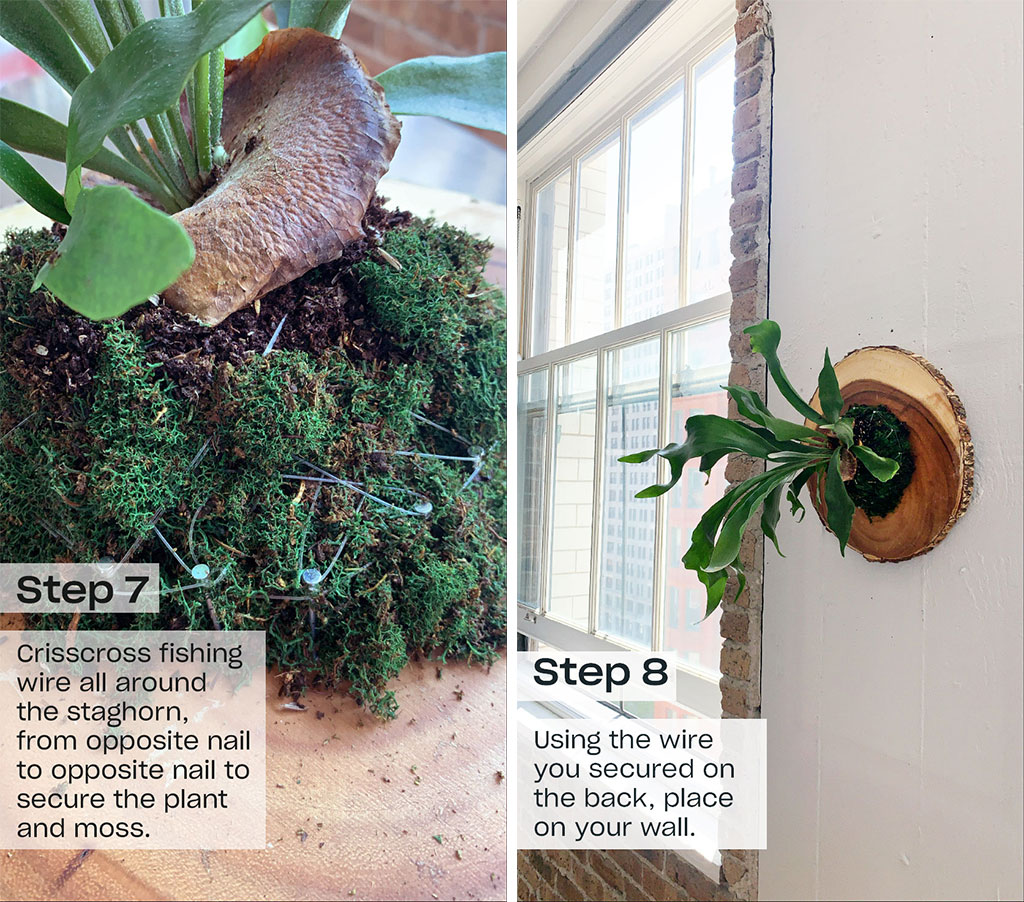
Step 7:
Using the fishing line, crisscross all around the staghorn base (while avoiding the “shield”—the brown bark-like bit—so it doesn’t tear). Go from opposite nail to opposite nail over and over again until it feels nice and secure. Tie it off and cut the excess line.
Step 8:
Once it’s secured, you’re ready to hang! Put it somewhere that has indirect light like in its natural habitat. To water it, its best to spray it but let it dry out between waterings so it’s not overwatered.