Resident Apt2B designer and small space guru Kyle Schuneman shows off one of his most clever and useful hacks yet! Watch as Kyle transforms one of our Apt2B Art Prints into a table that folds right up onto the wall. If you live in a small apartment or studio then this is the #2Bhack you’ve been waiting for.
The Wall Art Table is the perfect example of a small space solution that is both beautiful and functional. It’s also a truly unique project that’s sure to impress your guests!
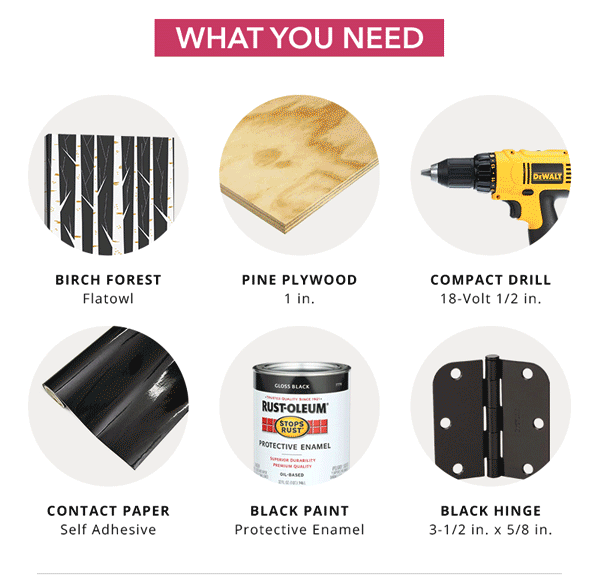
- Apt2B Framed Canvas Print (Kyle uses Flatowl BIRCH FOREST in this project)
- 1″ thick Plywood (same dimensions as your canvas print)
- Paint & Brush or Roller (same paint color as your print frame)
- Contact Paper
- 4 Hinges with Screws
- Latch & Hook
- Drill/Screwdriver
Step 1: Prepare The Plywood
The first step in creating your foldable wall art table (once you have all the materials assembled) is to have a 1″ thick piece of plywood cut to match the dimensions of your canvas print. We recommend having a trained professional at a hardware store do this cutting so that you can save time, money, and elbow grease for the rest of the project! Once you have your plywood cut to size you’ll want to paint the edges of the plywood the same color as the frame of your canvas print. In the video, Kyle uses a canvas print with a black frame. Therefore he chooses black paint for the edges of his plywood.
Once the plywood’s edges have been painted you’ll want to use contact paper to create a smooth and finished surface. Kyle again uses black contact paper since his canvas print features white and black as the dominant colors. However, he could have just as easily chosen white or any other color. Choose the color of contact paper that will work best for your style and your canvas print! Simply roll the contact paper onto the surface and smooth it out as you go. Try to avoid any bubbles or wrinkles!

Step 2: Attach The Hinges
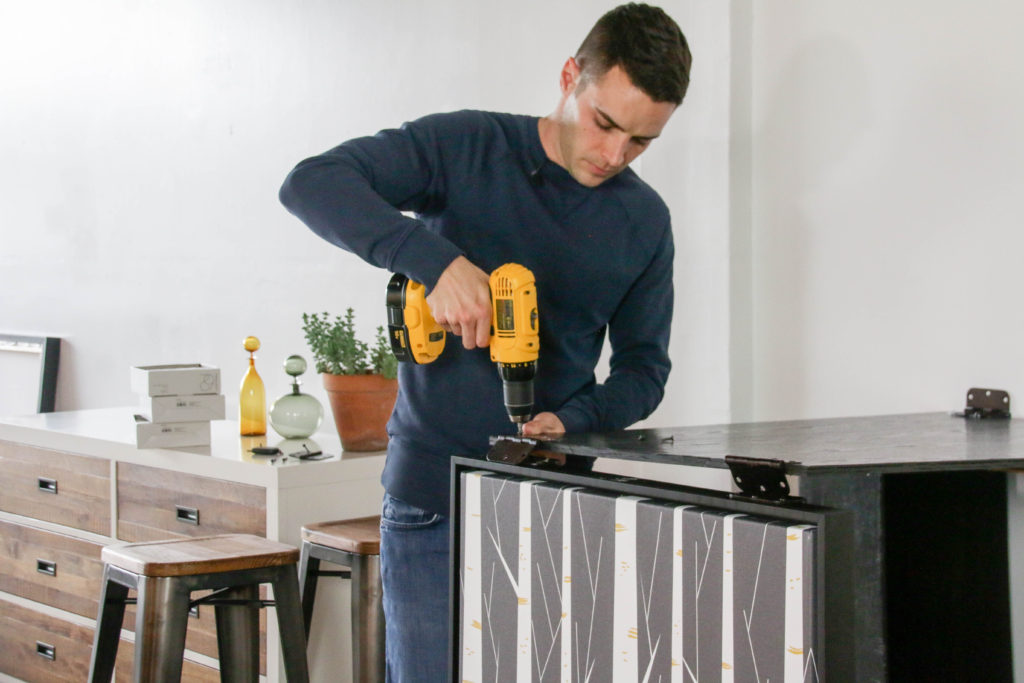
Now that your plywood board is looking gorgeous it’s time to install the hinges. You’ll be applying two hinges to each side of the plywood. Place the center of each hinge about 3″ from the side of the plywood. Half of each hinge should be hanging over the side of the plywood when you start to screw them into place. Two of the hinges will eventually be flush against the wall, and the other two hinges will be flush against the top of the canvas print. Screw the hinges into the plywood and get ready to…
Attach the open side of the hinges to the canvas print and the wall! In the video, Kyle supports the table on a set of stools and books so that he has it at the appropriate height. The height of the table should be the exact same height as the canvas print. Press the plywood against the wall and use the drill to screw the hinges into place. Then screw the hinges into the frame of the canvas print!
Step 3: Hook It Into Place
At this stage, you should have a perfectly functional table using the canvas print as the legs and the plywood for the surface. But isn’t art supposed to hang on the wall? It sure is! The next step is to install the hook and latch to the wall so that the canvas print can hang in place as a piece of artwork when it’s not being used as a table. Fold the table up against the wall so that you can mark the proper height for the hook and latch. Use a pencil to mark the spot. Then drill the hook into place! You’ll also need to drill the latch onto the top of the canvas print frame.
Voila! A true work of art. Pun definitely intended.
Looking for more #2BHacks? Then check out some of our other projects!
- DIY: Learn How-To Make The Perfect Gallery Wall In Just 2 Minutes!
- How to Use Wallpaper To Give Your Furniture A Funky Fresh Look | #2BHack

